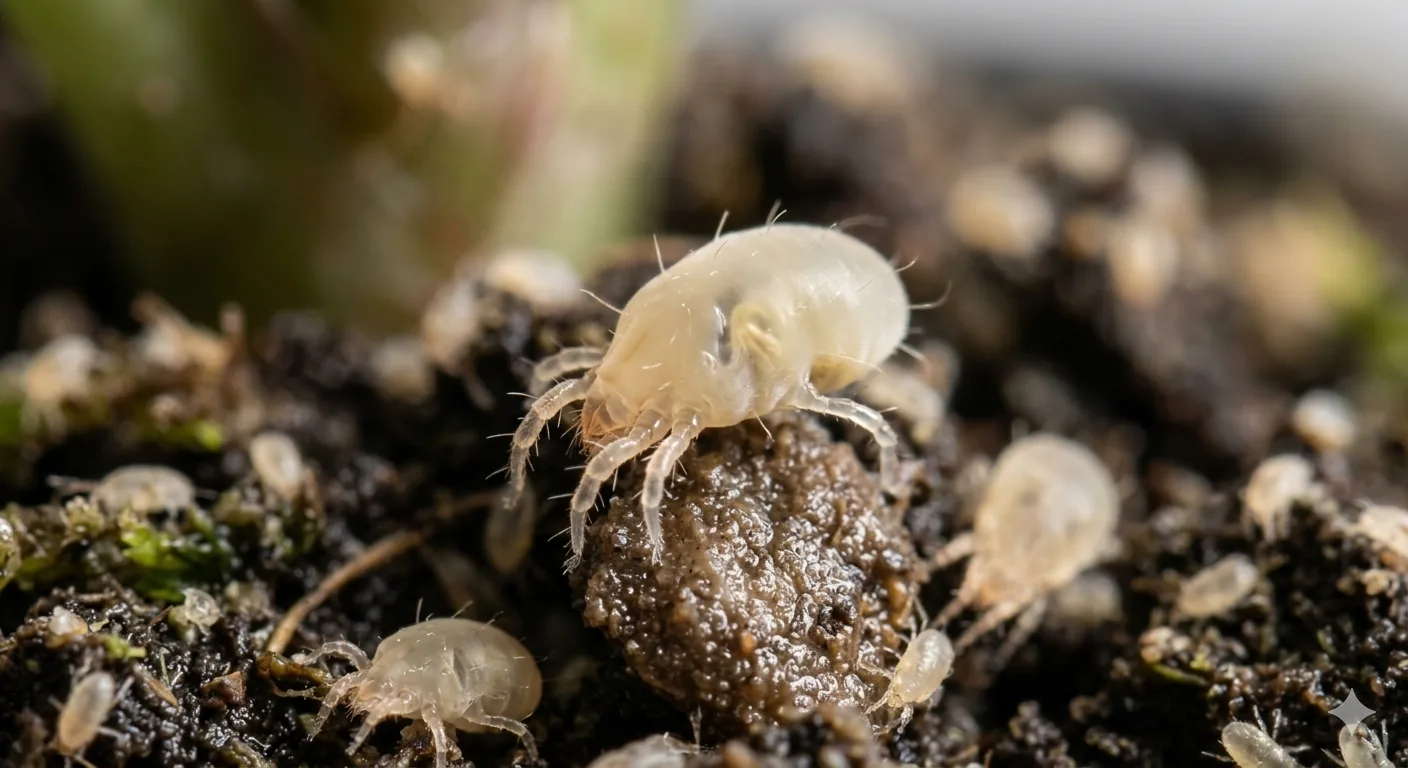
Why are there small bugs in my soil is often explained by soil mites, and many are harmless cleanup helpers. The important part is telling harmless soil mites from root-damaging problems like fungus gnat larvae. Correct ID prevents unnecessary spraying.
Why Are There Small Bugs in My Soil? Soil Mites vs Other Soil Pests

Quick Diagnosis
Why are there small bugs in my soil: quick diagnosis
Short answer
Most soil mites are indicators of wet organic media, not major leaf pests. First step: Check soil-dwelling bugs with magnification and rule out flying gnats, larvae, and above-leaf damage patterns.
Most likely causes
- High moisture and organic debris: soil stays damp and rich in breakdown material
- Poor drainage and airflow: topsoil rarely dries and smells stale
- Pest misidentification: any tiny soil bug is assumed harmful
- Occasional root-feeding species: growth decline persists with visible root stress
What to do first
- Dry the surface rhythm: Allow the top layer to dry between waterings. This alone often drops visible mite activity
- Clean the habitat: Remove dead leaves, algae, and decomposing top debris that supports soil pest buildup
- Confirm ID before treating: Use magnification and behavior checks to separate mites from larvae and springtails
- Repot if roots are truly stressed: If root decline persists, move to fresh, well-draining sterile mix and clean the container
What not to do yet
- Do not spray before checking hidden leaf undersides, stems, and soil-line areas
- Do not stop after one cleanup if eggs or hidden stages may still be present
- Do not treat nearby plants blindly, but inspect them before pests spread
Quick answer
Quick answer: Soil mites in moist organic potting mix. If leaves are clean and bugs stay in soil, these are often low-risk mites rather than major plant pests.
- Early sign: You notice tiny moving specks in potting mix, especially after watering
- Mid sign: Most harmless soil mites do not cause leaf stippling, silvering, or webbing
- Later sign: If roots are truly being fed on, you may see persistent wilting or weak growth
What it looks like, where it hides, and what damage it causes
What it looks like
Look for repeated visible pest markers plus fresh activity over time.
Where it hides
Inspect protected growth points, undersides, and node creases.
What damage it causes
Damage usually expands in clusters when active stages are not interrupted.
Symptoms to check first
Start with what you can clearly see right now before changing treatment or care variables.
Visible soil crawlers
You notice tiny moving specks in potting mix, especially after watering.
Minimal leaf symptoms
Most harmless soil mites do not cause leaf stippling, silvering, or webbing.
Stress only in severe cases
If roots are truly being fed on, you may see persistent wilting or weak growth.
Wet soil overlap
Issues often appear when media stays damp and rich in decaying organic matter.
Where to check on the plant
Inspect these locations before locking your diagnosis.
Top 1 to 2 inches of soil
Most soil mite activity is concentrated near moist surface organic matter.
Root zone during repot
Root checks help separate harmless mites from root-feeding problems.
Drain holes and pot edges
Moist creases can collect high activity and are easy to monitor.
Leaf undersides for comparison
If leaf pests are absent, diagnosis leans toward soil-only organisms.
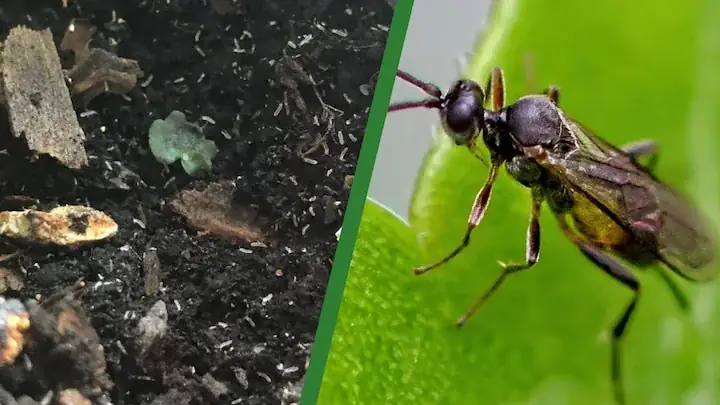
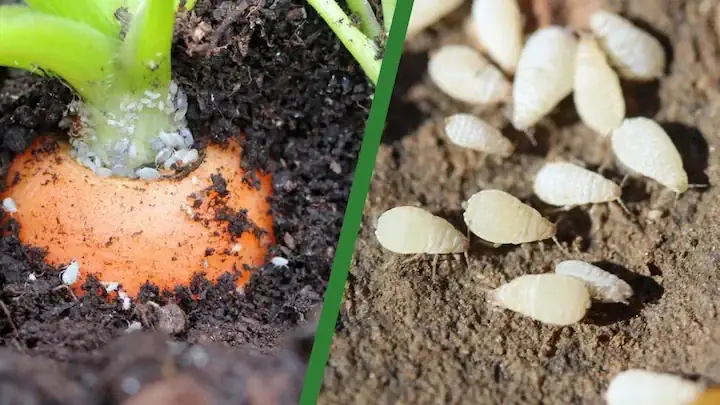
What this gets confused with
Use this quick contrast to reduce misdiagnosis before treatment.
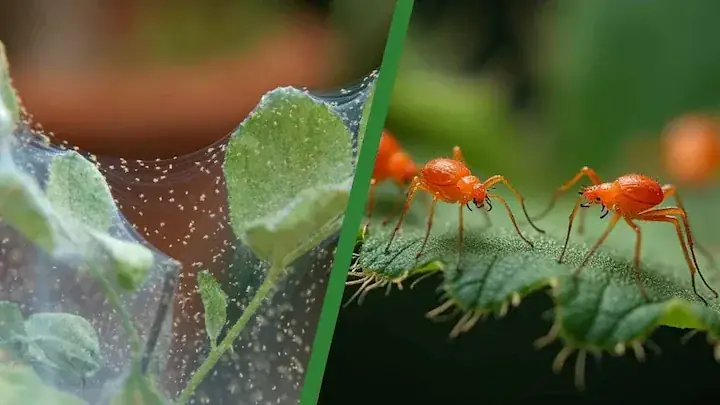
Fungus gnat larvae
Larvae are worm-like with dark heads and are often paired with flying adults.
Springtails
Springtails jump when disturbed; mites crawl but do not jump.
Spider mites
Spider mites are leaf pests and cause stippling/webbing, not mainly soil activity.
Why this happens
Choose the closest driver first, then run one correction at a time.
High moisture and organic debris
What it looks like: Soil stays damp and rich in breakdown material.
Why it happens: These conditions feed soil food-web organisms, including many harmless mites.
First correction: Isolate, clean visible activity, and begin repeat treatment cadence.
Poor drainage and airflow
What it looks like: Topsoil rarely dries and smells stale.
Why it happens: Long wet periods let populations build and stay visible.
First correction: Isolate, clean visible activity, and begin repeat treatment cadence.
Pest misidentification
What it looks like: Any tiny soil bug is assumed harmful.
Why it happens: Soil mites are often confused with gnat larvae or other pests.
First correction: Isolate, clean visible activity, and begin repeat treatment cadence.
Occasional root-feeding species
What it looks like: Growth decline persists with visible root stress.
Why it happens: A smaller subset of mites can feed on roots under favorable conditions.
First correction: Isolate, clean visible activity, and begin repeat treatment cadence.
How to confirm it
Before you treat, run these checks to confirm you are targeting the right problem.
-
Sticky-card check for adults
Low adult fly catches supports mites over fungus gnats.
-
Soil disturbance check
Mites crawl in soil; they do not fly or jump strongly.
-
Leaf damage cross-check
Lack of leaf pattern damage supports a soil-only issue.
-
Root health check
Healthy white roots suggest low-risk soil mites rather than destructive pests.
Treatment cadence and repeat intervals
- Interval: Every 5 to 7 days
- Rounds: 3 cycles minimum
- Recheck window: Recheck every 48 to 72 hours
- Stop rule: Stop only after no new signs across repeat checks.
Signs it is improving vs signs it is getting worse
Improving signs
- Fewer fresh signs appear between checks.
- Damage progression slows on new growth.
Worsening signs
- Fresh hotspots appear on new tissue.
- Nearby plants start showing the same pattern.
How to fix it
Follow the sequence without skipping repeat cycles.
Dry the surface rhythm
Allow the top layer to dry between waterings. This alone often drops visible mite activity.
Clean the habitat
Remove dead leaves, algae, and decomposing top debris that supports soil pest buildup.
Confirm ID before treating
Use magnification and behavior checks to separate mites from larvae and springtails.
Repot if roots are truly stressed
If root decline persists, move to fresh, well-draining sterile mix and clean the container.
Use targeted products sparingly
Only escalate if root damage continues after moisture correction and ID confirmation.
Track growth recovery
Healthy new growth and stable roots indicate the issue is controlled.
⚠ Escalate quickly if you notice:
- Ongoing wilt or yellowing with confirmed root damage.
- Root tips are disappearing or rotting despite moisture correction.
- Large soil bug numbers persist across multiple pots.
- You also find flying adults or larvae, suggesting a different pest.
How to prevent it
Use these habits to reduce reinfestation risk and catch activity early.
-
Topsoil moisture control
Stable dry-down cycles reduce pest pressure in media.
-
Routine debris cleanup
Less decaying material means fewer food resources for outbreaks.
-
Periodic root checks
Root condition confirms whether action is needed or not.
-
Quarantine practice
This prevents new pest introductions across your collection.
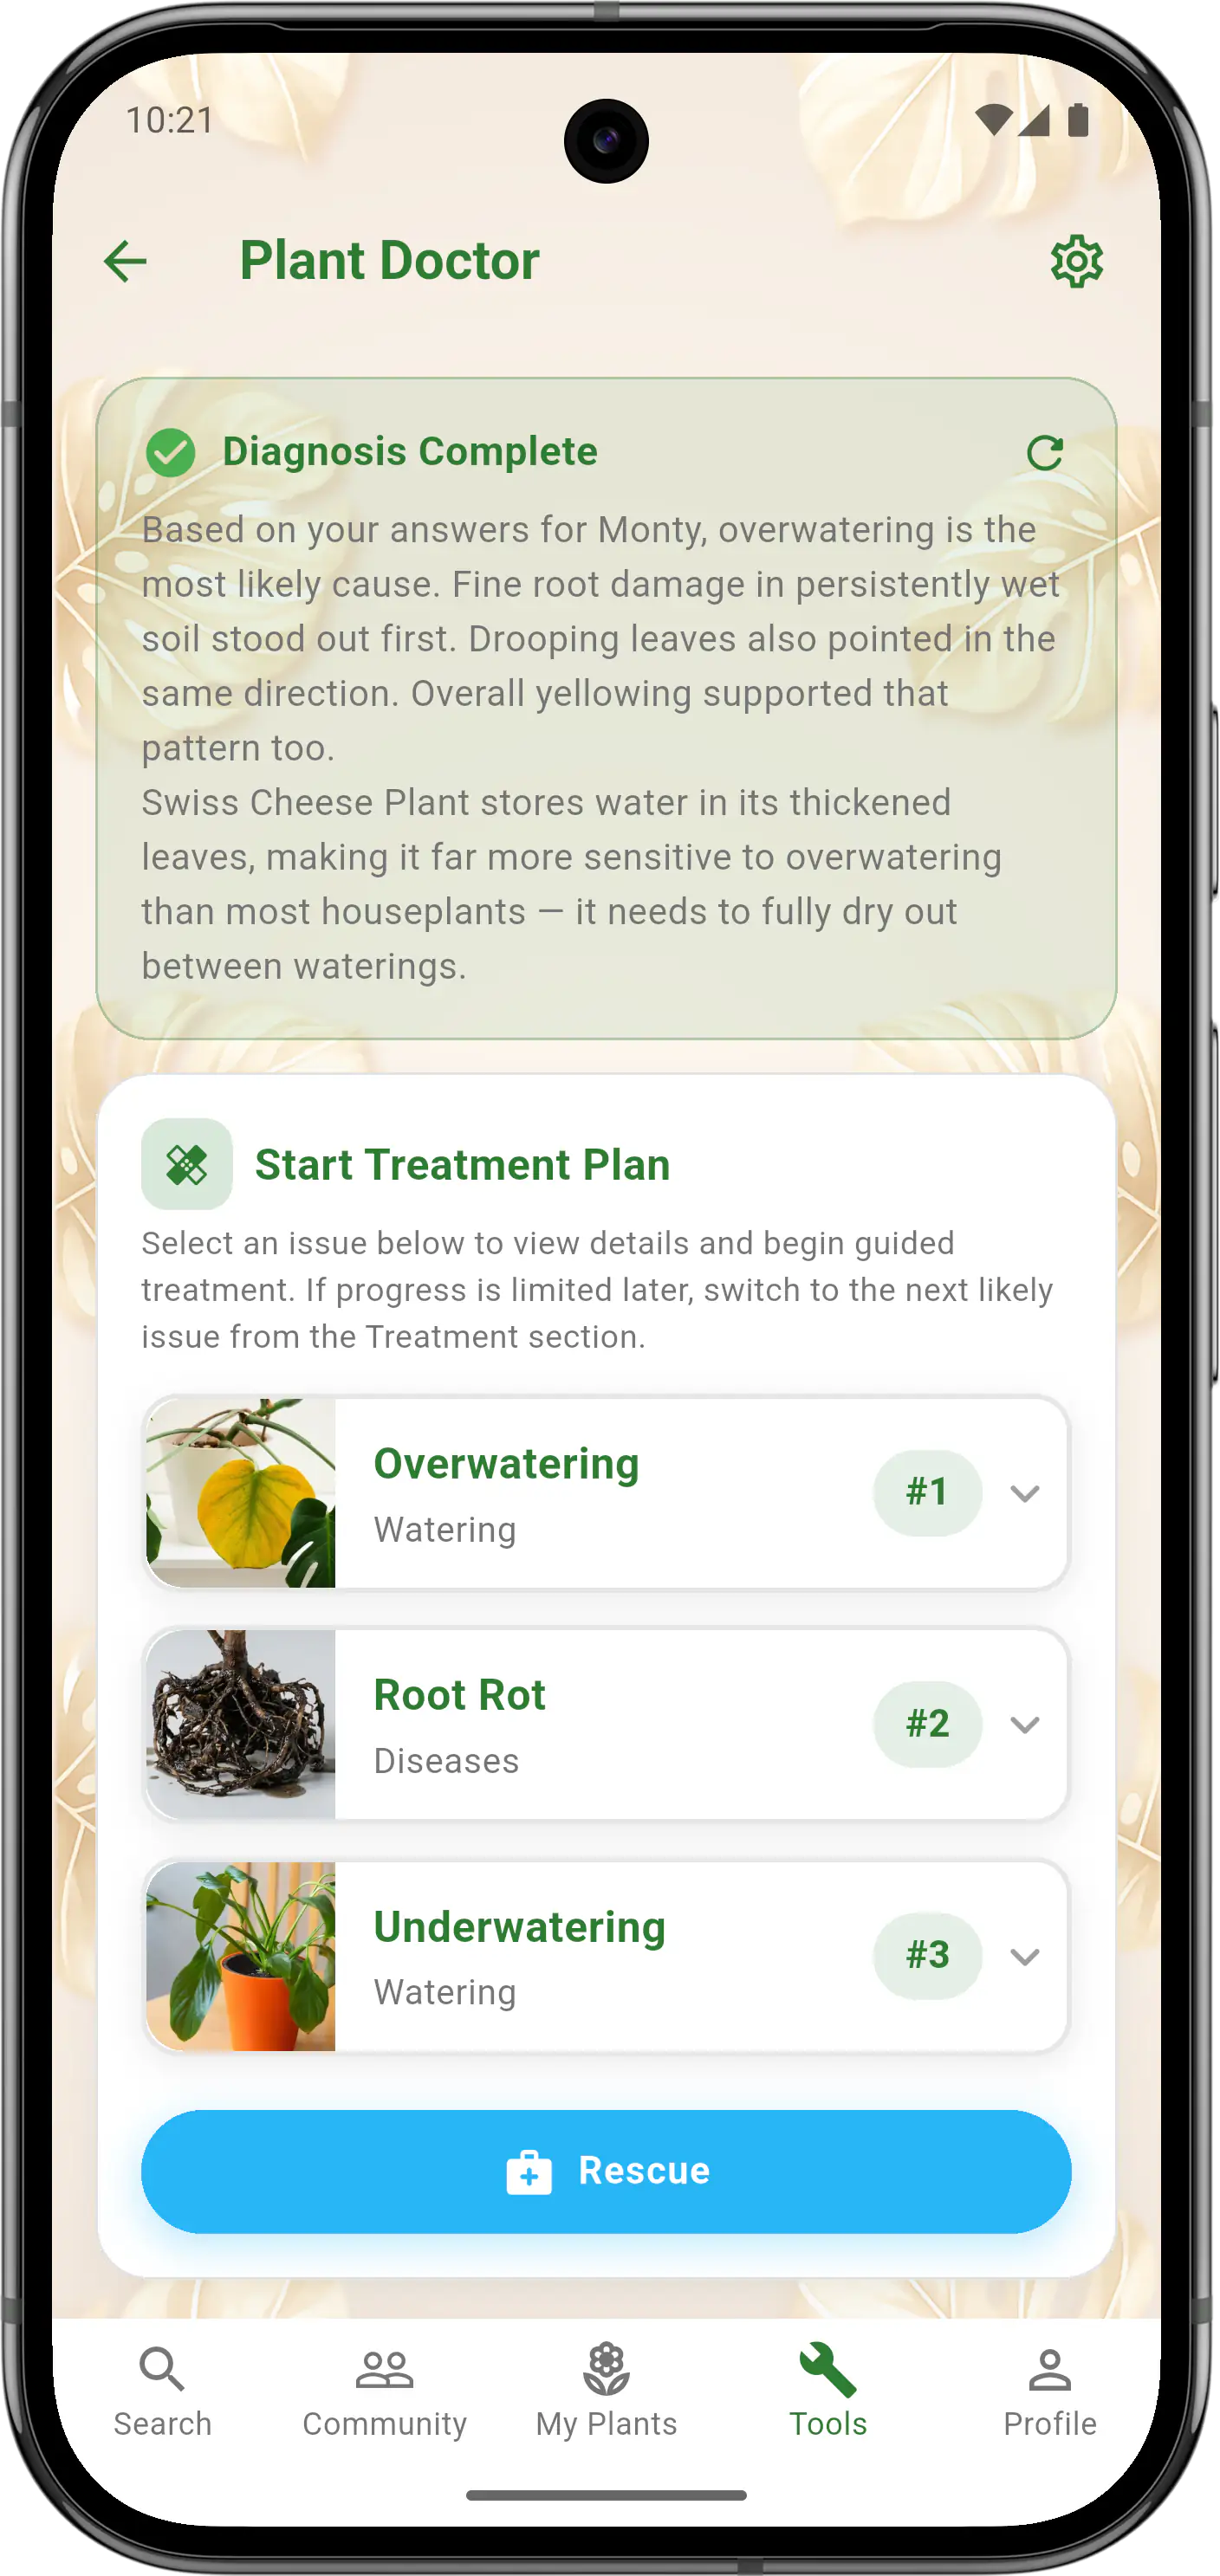
Plant Doctor
Not sure if these soil bugs are harmless or a real threat?
Plant Doctor helps separate low-risk soil mite activity from root-damaging pest cycles so you avoid unnecessary treatment.
Pattern clarity
Helps you spot patterns you might miss when symptoms overlap.
Cause separation
Uses recent care history and symptom changes to narrow likely causes.
Guided next steps
Supports observation over time so fixes stay consistent and practical.

Frequently Asked Questions
Keep the first pass simple so you can separate likely causes from noise. For small bugs, prioritize the most direct confirmation step first. Compare symptom timing with your last watering and placement change before doing anything else. Track results for 7 to 14 days so you can confirm what improved.
Use a quick diagnosis pass first so your next step matches the actual issue. When these soil is involved, compare current conditions to the last stable week. A simple light check and moisture-depth check usually rules out the biggest mistakes quickly. Keep a short log so you can stop repeating low-value changes.
Use a quick diagnosis pass first so your next step matches the actual issue. With treat soil, document one clear signal before changing routines. A simple light check and moisture-depth check usually rules out the biggest mistakes quickly. Make one small adjustment at a time to avoid overcorrecting.
Use a baseline check first so fixes are based on evidence, not guesses. For safest, avoid broad resets and test one correction at a time. Confirm whether the issue is worsening, stable, or improving before stacking new treatments. Document what changed this week so future decisions stay clear.
Control Plant Pests With More Confidence
Use Plant Doctor to identify likely pests and follow practical treatment steps that are easier to stick with.
- Identify likely pests faster
- Follow repeatable treatment steps
- Reduce reinfestation risk