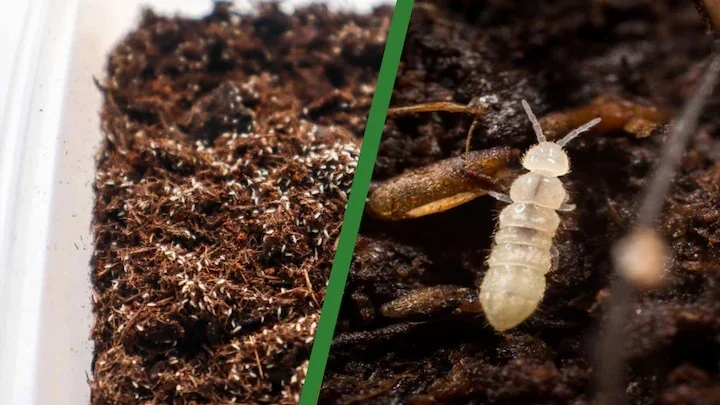
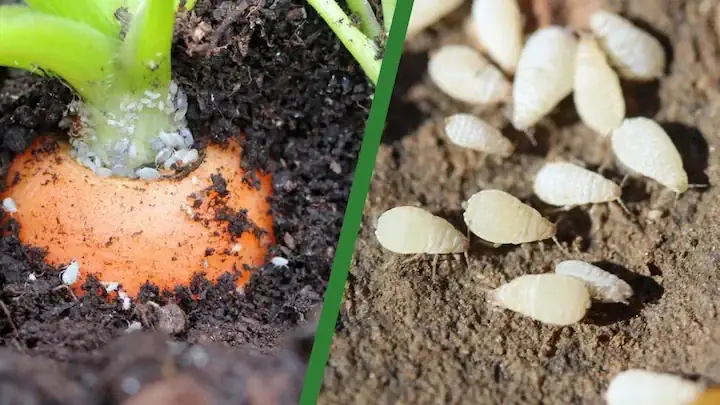
Why are there jumping bugs in my soil is usually a springtail pattern. In many setups they are mostly harmless decomposers, but very high numbers can damage seedlings and tender growth. Moisture control is the main fix.
Why Are There Jumping Bugs in My Soil? Springtail Signs and Fixes

Quick Diagnosis
Why are there jumping bugs in my soil: quick diagnosis
Short answer
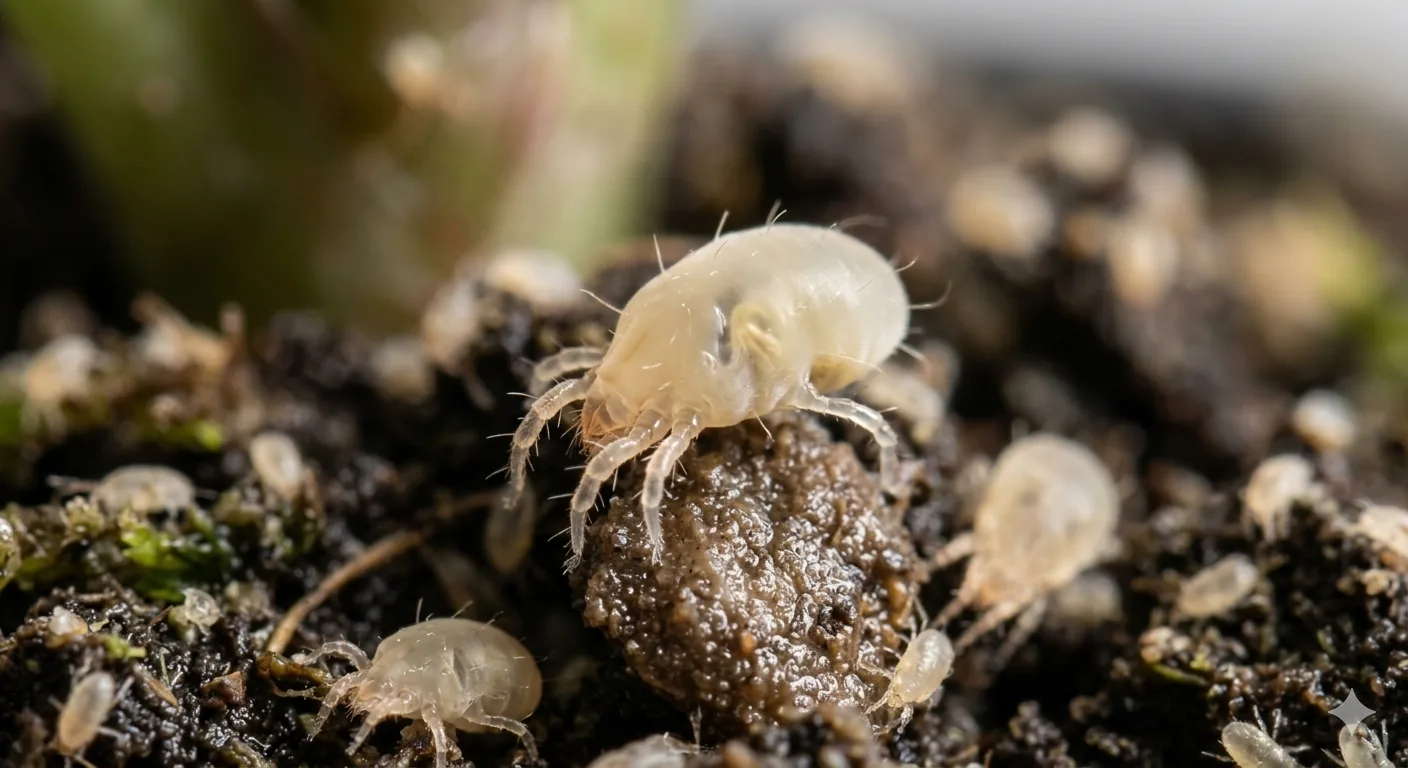
Springtails are usually moisture-indicator pests in soil systems. First step: Disturb moist topsoil and confirm tiny wingless bugs that jump rather than fly.
Most likely causes
- Wet habitat expansion: soil remains moist most of the week
- Debris-rich surface: decaying material accumulates on topsoil
- Humidity and airflow imbalance: closed or crowded setups stay muggy
- Seedling sensitivity: damage shows mostly on very young plants
What to do first
- Dry the top layer: Stretch watering intervals so the top 1 to 2 inches dry properly. This is the most effective first step
- Clean habitat: Remove wet leaves, algae, and compact debris where springtails gather
- Increase airflow: Space plants, use gentle fan movement, and reduce stagnant humidity pockets
- Repot if populations stay heavy: Move sensitive plants into fresh, well-draining sterile mix when activity remains high
What not to do yet
- Do not spray before checking hidden leaf undersides, stems, and soil-line areas
- Do not stop after one cleanup if eggs or hidden stages may still be present
- Do not treat nearby plants blindly, but inspect them before pests spread
Quick answer
Quick answer: Springtails. If tiny bugs jump from moist soil, they are usually springtails and moisture correction is the core fix.
- Early sign: Most noticeable right after watering or when topsoil is disturbed
- Mid sign: Young plants may wilt or stall if populations are very high
- Later sign: Less common, but possible on fragile seedlings
What it looks like, where it hides, and what damage it causes
What it looks like
Look for repeated visible pest markers plus fresh activity over time.
Where it hides
Inspect protected growth points, undersides, and node creases.
What damage it causes
Damage usually expands in clusters when active stages are not interrupted.
Symptoms to check first
Start with what you can clearly see right now before changing treatment or care variables.
Jumping specks in soil
Most noticeable right after watering or when topsoil is disturbed.
Seedling stress in heavy infestations
Young plants may wilt or stall if populations are very high.
Tiny chew pits on very tender leaves
Less common, but possible on fragile seedlings.
Few symptoms on mature plants
Established plants are often only mildly affected or unaffected.
Where to check on the plant
Inspect these locations before locking your diagnosis.
Topsoil and pot edges
Springtails concentrate where moisture and organic debris are highest.
Under mulch or surface debris
These damp shelters protect populations between watering cycles.
Seedling trays and crowns
Tender young tissue is the most likely place to see feeding issues.
After watering
This timing makes jump behavior easiest to confirm.
What this gets confused with
Use this quick contrast to reduce misdiagnosis before treatment.
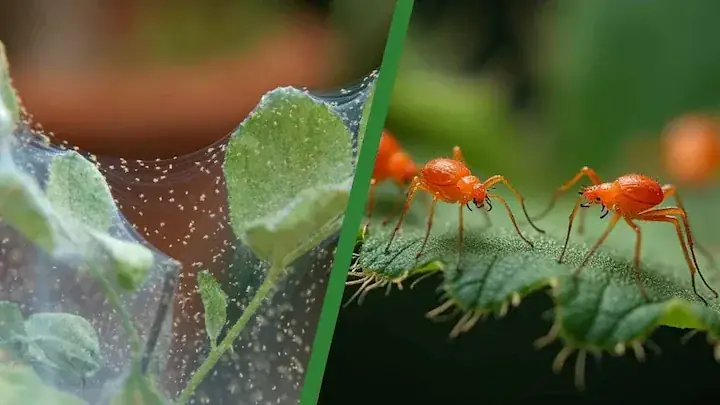
Thrips
Thrips are leaf pests causing silver scars and black frass; springtails are mostly soil jumpers.
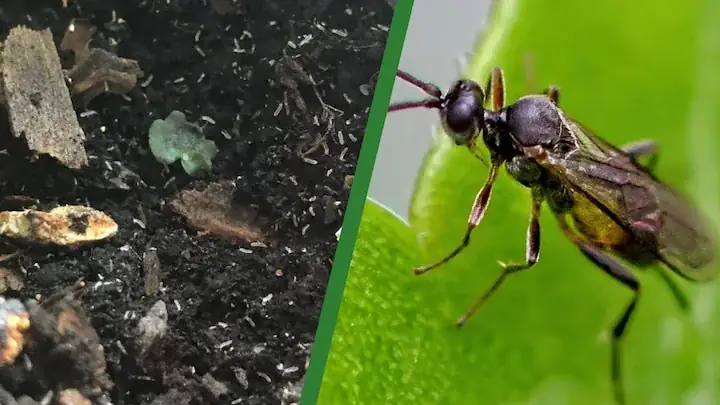
Fungus gnats
Gnats fly and have larvae; springtails jump and are wingless.
Flea beetles
Flea beetles are larger and mainly feed on foliage, not potting soil.
Why this happens
Choose the closest driver first, then run one correction at a time.
Wet habitat expansion
What it looks like: Soil remains moist most of the week.
Why it happens: Springtails reproduce best in damp, organic conditions.
First correction: Isolate, clean visible activity, and begin repeat treatment cadence.
Debris-rich surface
What it looks like: Decaying material accumulates on topsoil.
Why it happens: This provides food and shelter for population growth.
First correction: Isolate, clean visible activity, and begin repeat treatment cadence.
Humidity and airflow imbalance
What it looks like: Closed or crowded setups stay muggy.
Why it happens: Stagnant moisture supports larger swarms.
First correction: Isolate, clean visible activity, and begin repeat treatment cadence.
Seedling sensitivity
What it looks like: Damage shows mostly on very young plants.
Why it happens: Tender tissue is easier to chew when populations spike.
First correction: Isolate, clean visible activity, and begin repeat treatment cadence.
How to confirm it
Before you treat, run these checks to confirm you are targeting the right problem.
-
Disturb-and-jump test
Tiny insects spring away rapidly rather than flying slowly.
-
Soil cup water test
Springtails float and cluster on water surface from disturbed soil.
-
Leaf symptom cross-check
Minimal leaf pattern damage supports a soil springtail diagnosis.
-
One-week moisture test
Activity should drop after consistent topsoil dry-down.
Treatment cadence and repeat intervals
- Interval: Every 5 to 7 days
- Rounds: 3 cycles minimum
- Recheck window: Recheck every 48 to 72 hours
- Stop rule: Stop only after no new signs across repeat checks.
Signs it is improving vs signs it is getting worse
Improving signs
- Fewer fresh signs appear between checks.
- Damage progression slows on new growth.
Worsening signs
- Fresh hotspots appear on new tissue.
- Nearby plants start showing the same pattern.
How to fix it
Follow the sequence without skipping repeat cycles.
Dry the top layer
Stretch watering intervals so the top 1 to 2 inches dry properly. This is the most effective first step.
Clean habitat
Remove wet leaves, algae, and compact debris where springtails gather.
Increase airflow
Space plants, use gentle fan movement, and reduce stagnant humidity pockets.
Repot if populations stay heavy
Move sensitive plants into fresh, well-draining sterile mix when activity remains high.
Biological assist if needed
In persistent systems, predatory soil mites can help lower springtail numbers.
Recheck weekly
Confirm fewer jumpers and better seedling growth before ending the cycle.
⚠ Escalate quickly if you notice:
- Seedlings continue wilting or collapsing.
- Jumping activity stays high after 1 to 2 weeks of dry-down.
- Feeding pits continue on new tender leaves.
- Outbreak spreads to multiple nearby containers.
How to prevent it
Use these habits to reduce reinfestation risk and catch activity early.
-
Weekly moisture checks
Prevents the damp conditions that drive springtail spikes.
-
Surface cleanup
Less food and shelter means smaller populations.
-
Seedling-focused scouting
Young plants are the first place where damage usually shows.
-
Quarantine routine
Reduces chance of introducing large springtail populations.
Plant Doctor
Jumping soil bugs keep showing up after watering?
Plant Doctor helps confirm springtails and focus treatment on moisture and habitat, not random spray switching.
Pattern clarity
Helps you spot patterns you might miss when symptoms overlap.
Cause separation
Uses recent care history and symptom changes to narrow likely causes.
Guided next steps
Supports observation over time so fixes stay consistent and practical.
Frequently Asked Questions
Start with one direct check before changing care routines. For jumping bugs, avoid broad resets and test one correction at a time. Check light level, soil moisture depth, and root condition before making changes. Document what changed this week so future decisions stay clear.
Keep the first pass simple so you can separate likely causes from noise. For springtails harmful, avoid broad resets and test one correction at a time. Compare symptom timing with your last watering and placement change before doing anything else. Document what changed this week so future decisions stay clear.
Start with one direct check before changing care routines. When confirm springtails is involved, compare current conditions to the last stable week. Check light level, soil moisture depth, and root condition before making changes. Keep a short log so you can stop repeating low-value changes.
Start with one direct check before changing care routines. For springtail treatment, avoid broad resets and test one correction at a time. Check light level, soil moisture depth, and root condition before making changes. Document what changed this week so future decisions stay clear.
Control Plant Pests With More Confidence
Use Plant Doctor to identify likely pests and follow practical treatment steps that are easier to stick with.
- Identify likely pests faster
- Follow repeatable treatment steps
- Reduce reinfestation risk