How to repot houseplants becomes more reliable when you use measurable ranges and repeatable routines instead of generic tips.
How to Repot Houseplants

Quick Action Overview
At a glance: what to do first
Repot when root and dry-down signals align, not just by calendar date.
Increase container diameter by one size step only.
Preserve healthy roots and limit heavy pruning in one session.
Stabilize watering and light for 2 to 4 weeks after repotting.
Core Explanation
How repotting actually works
Repotting works best when timing, pot-size increment, and root handling are measured instead of rushed.
Root density
When roots circle heavily and media volume is minimal, hydration and nutrient buffering become unstable.
Pot-size jump
Large jumps hold excess wet media and can trigger prolonged wet-root stress.
Aftercare window
Plants need a short stabilization period before returning to full feeding cadence.
If symptoms overlap, compare root rot in plants and overwatering plants before making multiple changes.
Step-By-Step System
Build a repeatable repotting system
Step 1 - Confirm repot triggers
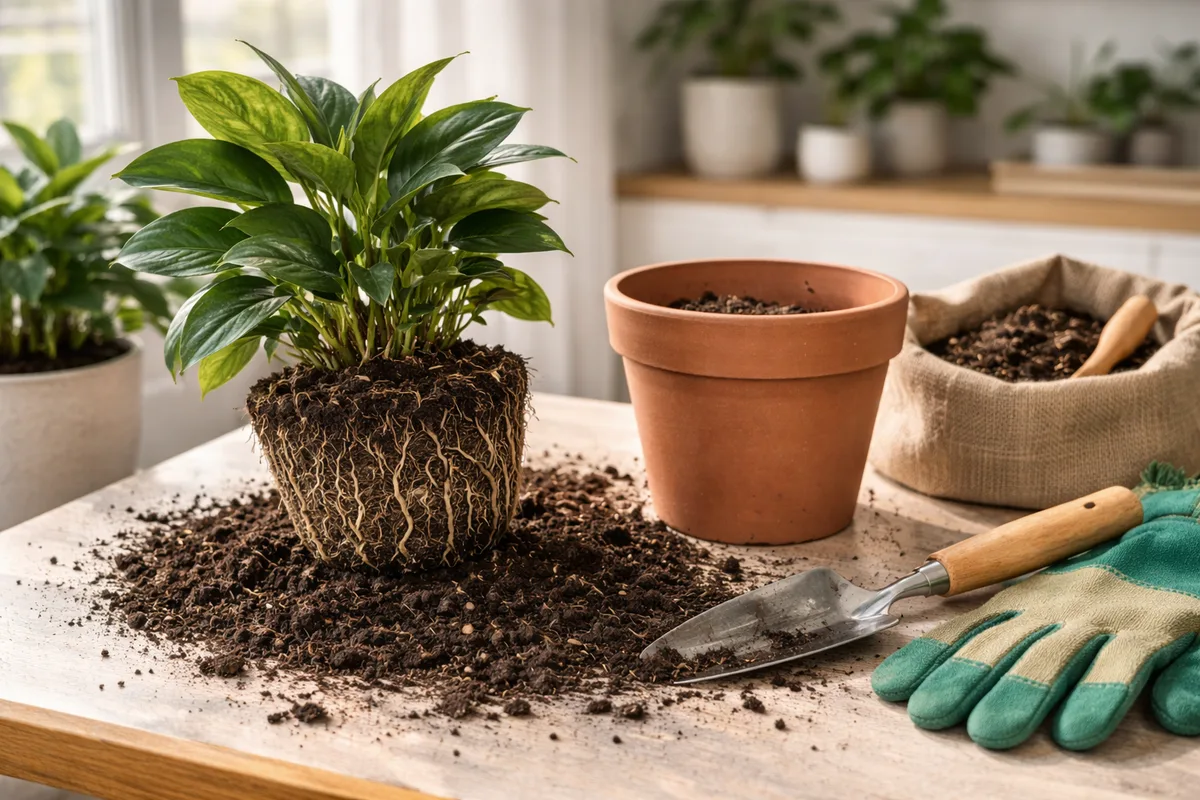
Inspect roots and review dry-down behavior before unpotting.
Target range: Repot when roots are dense around edges and dry-down becomes too fast (often under 2 to 4 days).
Step 2 - Choose the next pot size
Upsize conservatively.
Target range: Increase diameter by about 2 to 5 cm (one pot size).
Step 3 - Reset substrate structure
Use a fresh, airy blend matched to species and environment.
Target range: Aim for consistent moisture plus strong airflow, not maximal retention.
Step 4 - Handle roots carefully
Loosen circling roots and trim only damaged sections.
Target range: Keep heavy root removal under about 20% unless rot treatment is required.
Why This Works
Why condition-based repotting decisions are more reliable
Most repotting problems come from timing mismatches, not effort. When routine and plant demand drift apart, stress builds before symptoms become obvious.
A condition-based approach lowers over-correction. You verify real signals first, then make one change at a time so results are easier to read.
This creates a repeatable system you can adapt through season changes without resetting your entire routine.
Key Variables
Use these variables as your control panel
Root density
When roots circle heavily and media volume is minimal, hydration and nutrient buffering become unstable.
Pot-size jump
Large jumps hold excess wet media and can trigger prolonged wet-root stress.
Aftercare window
Plants need a short stabilization period before returning to full feeding cadence.
Common Mistakes
Errors that create avoidable stress
Oversized pot jumps
Creates excess wet media and slower oxygen exchange around roots.
Do this instead: Move up one size step and monitor dry-down after repotting.
Repotting and heavy feeding together
Stresses newly disturbed roots and delays recovery.
Do this instead: Focus on hydration stability first, then resume feeding later.
No trigger-based timing
Unnecessary repots increase stress without improving growth.
Do this instead: Repot only when root density and performance signals support it.
Practical Ranges
Concrete ranges you can apply immediately
Confirm repot triggers
Action
Inspect roots and review dry-down behavior before unpotting.
Target range
Repot when roots are dense around edges and dry-down becomes too fast (often under 2 to 4 days).
Choose the next pot size
Action
Upsize conservatively.
Target range
Increase diameter by about 2 to 5 cm (one pot size).
Reset substrate structure
Action
Use a fresh, airy blend matched to species and environment.
Target range
Aim for consistent moisture plus strong airflow, not maximal retention.
Real Example
Case study: Pothos repot progression
Situation
A measured one-step upsize is usually more stable than dramatic container jumps.
Mistake
Trigger: roots circling with dry-down consistently under about 3 days in medium light.
Adjustment
Pot increase: around +2 to +4 cm in diameter per repot event.
Result
Aftercare: no fertilizer for 3 to 4 weeks while maintaining stable medium-bright indirect light.
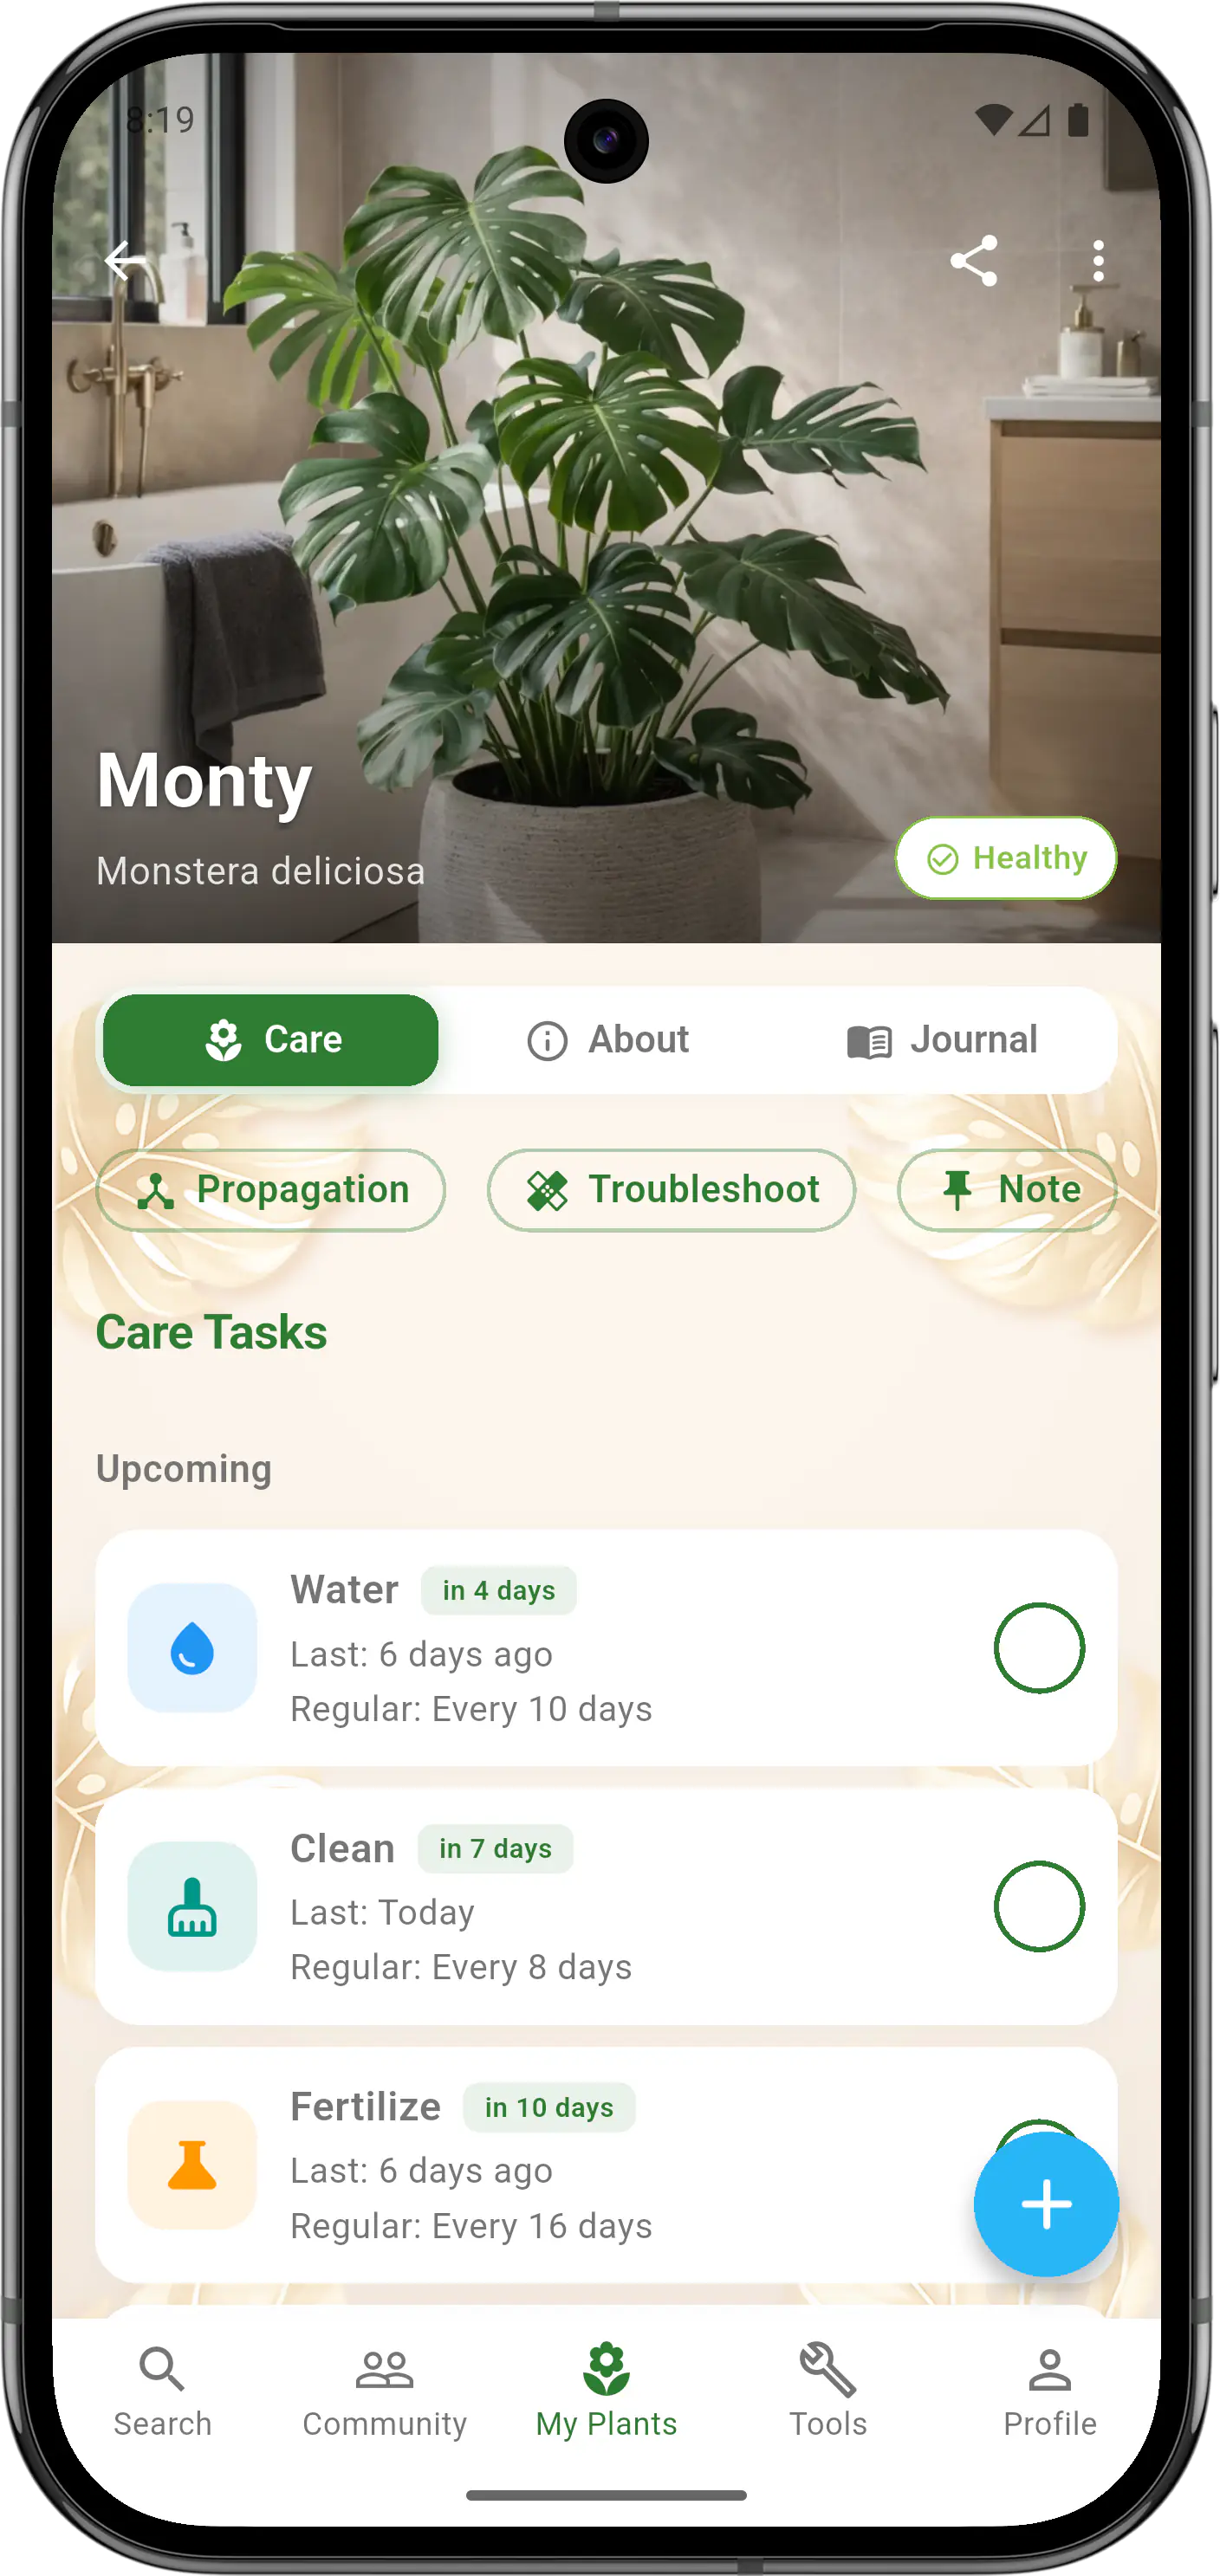
Smart Care
Turn Plant Advice Into a Routine You Can Keep
Smart Care helps you stay on track with watering, feeding, and repotting so your plants stay healthier over time.
Stay consistent
Helpful reminders keep watering, feeding, and repotting on track.
See what is working
Care history helps you notice patterns before problems get worse.
Adjust with confidence
Simple guidance helps you improve your routine over time.


Frequently Asked Questions
Common signs are dense circling roots, rapidly shrinking watering intervals, and reduced growth despite stable light and care. A simple way to do this is to check light and soil moisture first, then track the result for 7 to 14 days.
Usually no. One size up, roughly 2 to 5 cm wider, is typically safer for root oxygen and moisture control. Before deciding, check current light, soil moisture, and root condition so your next step is based on what is actually happening.
Severe shock is possible when roots are heavily damaged or aftercare is unstable, but most plants recover when repotting is conservative and conditions stay steady. Before deciding, check current light, soil moisture, and root condition so your next step is based on what is actually happening.
Use a structured indoor mix with both retention and aeration. Avoid dense media that stays wet for too long after repotting. Pick the option that fits your light, schedule, and room setup, because fit matters more than trends.
Keep Your Plant Routine Simple and Consistent
Track watering, feeding, and repotting in one place so your plants stay healthier long term.
- Helpful reminders
- Clear care tracking
- Guidance for each plant