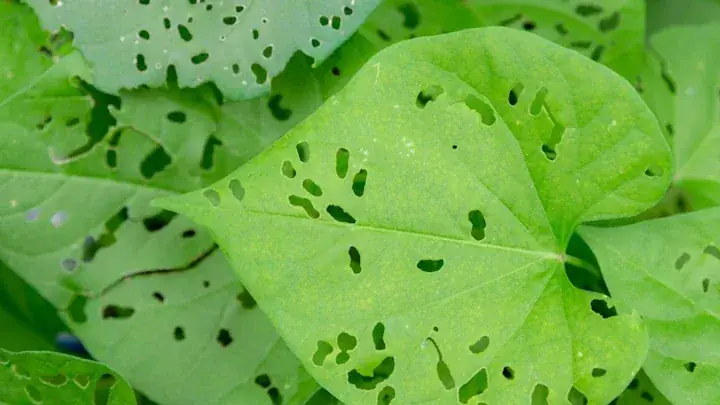
Why do my leaves have holes is mostly a timing question: is damage still happening, or are you seeing old scars. Check newest leaves first before you spray.
Why Do My Leaves Have Holes

Quick Diagnosis
My leaves have holes: quick diagnosis
Short answer
Leaf holes are a pattern, so diagnosis depends on whether damage is old, expanding, or tied to visible pests. First step: Inspect leaf undersides and nearby soil for pests, then track whether brand-new leaves develop fresh holes.
Most likely causes
- Chewing pests: new holes keep appearing on fresh growth
- Unfurling tears: holes appear as leaves open from tight rolls
- Mechanical injury: damage is random and not progressing
- Historic damage: older leaves are marked while new leaves stay clean
What to do first
- Check newest leaves first to see if damage is active
- Inspect undersides and stems before selecting any treatment
- Isolate only if live pests or fresh feeding is confirmed
- Remove only severely damaged leaves, not minor cosmetic holes
What not to do yet
- Do not change several care variables at once
- Do not add fertilizer before checking moisture, light, and roots
- Do not repot unless roots, drainage, or soil structure point to a root-zone problem
Symptoms to check first
Start with visible symptom patterns first, then move to causes. Symptoms can overlap, so check what you can observe before changing your routine.
Clean Holes With Stable Edges
These often come from old mechanical or unfurling damage, not active chewing right now.
Ragged Holes On New Leaves
When fresh leaves keep getting damaged, active pests are much more likely.
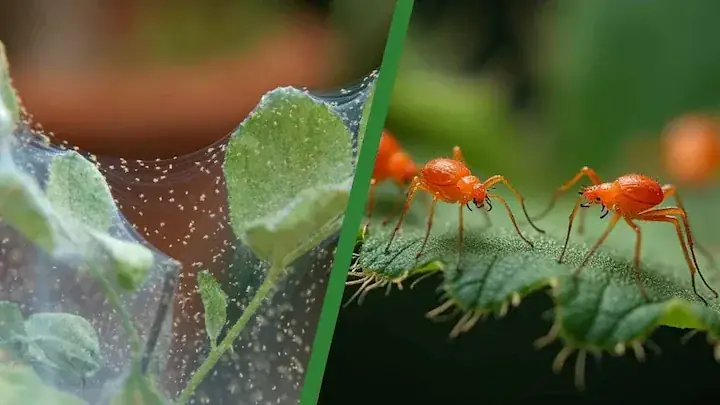
Holes Plus Black Specks
This pattern can indicate active feeding and should trigger immediate underside checks.
Top causes of my leaves have holes
Leaf holes are a pattern, so diagnosis depends on whether damage is old, expanding, or tied to visible pests. Symptoms can overlap, so confirm moisture, light, and root-zone conditions before making multiple changes at once.
Check these first
Rule out water, light, and soil conditions before changing your full routine.
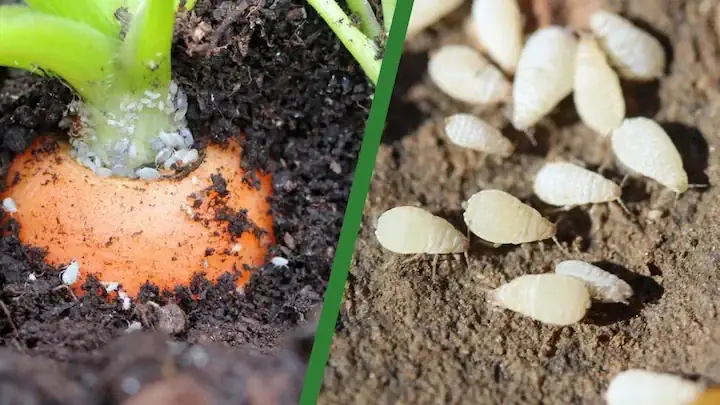
Chewing pests
New holes keep appearing on fresh growth.
Unfurling tears
Holes appear as leaves open from tight rolls.
Mechanical injury
Damage is random and not progressing.
Compare related guides for what are these tiny bugs on my plants, why is there webbing on my plant, compare overwatering and root stress if symptoms overlap.
⚡ Fastest next step: Inspect leaf undersides and nearby soil for pests, then track whether brand-new leaves develop fresh holes.
Tracking moisture patterns over time helps remove guesswork. Plantology's Plant Doctor can automate this so decisions are based on history, not memory.
How to tell which cause fits
Start with the closest match. If several causes seem possible, track what changes over a few days and compare response patterns.
Many plant owners misdiagnose these symptoms because causes overlap. Tracking care history is often the easiest way to separate likely triggers.
Chewing pests
What it looks like: New holes keep appearing on fresh growth.
Why it happens: Active feeders remove tissue repeatedly, so damage spreads over time.
First correction: Inspect undersides in bright light and isolate if fresh chewing is confirmed.
Unfurling tears
What it looks like: Holes appear as leaves open from tight rolls.
Why it happens: Tissue tears during expansion when moisture and humidity are unstable.
First correction: Keep watering and humidity steadier during new-leaf expansion.
Mechanical injury
What it looks like: Damage is random and not progressing.
Why it happens: Handling or transport can tear tissue once without ongoing spread.
First correction: Stabilize placement and monitor new leaves for one week before treating.
Historic damage
What it looks like: Older leaves are marked while new leaves stay clean.
Why it happens: Old injury remains visible even after conditions improve.
First correction: Focus on clean new growth as proof of recovery.
If you are still unsure, Plantology's Plant Doctor can track your care history and help narrow likely causes over a few days.
How to fix my leaves have holes on houseplants
Follow these steps in order so you can identify what helps without introducing conflicting changes.
Step 1
Check newest leaves first to see if damage is active.
Step 2
Inspect undersides and stems before selecting any treatment.
Step 3
Isolate only if live pests or fresh feeding is confirmed.
Step 4
Remove only severely damaged leaves, not minor cosmetic holes.
Step 5
Correct humidity and watering rhythm if tears happen while unfurling.
Step 6
Recheck in 7 days and compare only newly emerging leaves.
Most common mistake: Changing multiple variables at once and then not knowing what worked.
Plantology's Plant Doctor helps keep changes isolated so you can see which adjustment actually improved the plant.
How to prevent my leaves have holes on houseplants
Use these habits to reduce repeat symptoms and catch stress earlier.
-
Inspect new growth weekly instead of judging from old scars
Use this as a repeatable care habit so symptoms are easier to compare over time.
-
Keep humidity and watering steadier during growth flushes
Use this as a repeatable care habit so symptoms are easier to compare over time.
-
Quarantine new plants before placing near your collection
Use this as a repeatable care habit so symptoms are easier to compare over time.
-
Avoid rough handling while leaves are tender
Use this as a repeatable care habit so symptoms are easier to compare over time.
-
Treat only when fresh damage confirms active cause
Use this as a repeatable care habit so symptoms are easier to compare over time.
Pro tip: A short weekly note on watering, light, and leaf changes is often enough to catch patterns early.
If consistency is hard to maintain, Plantology's Plant Doctor can help reveal patterns early.
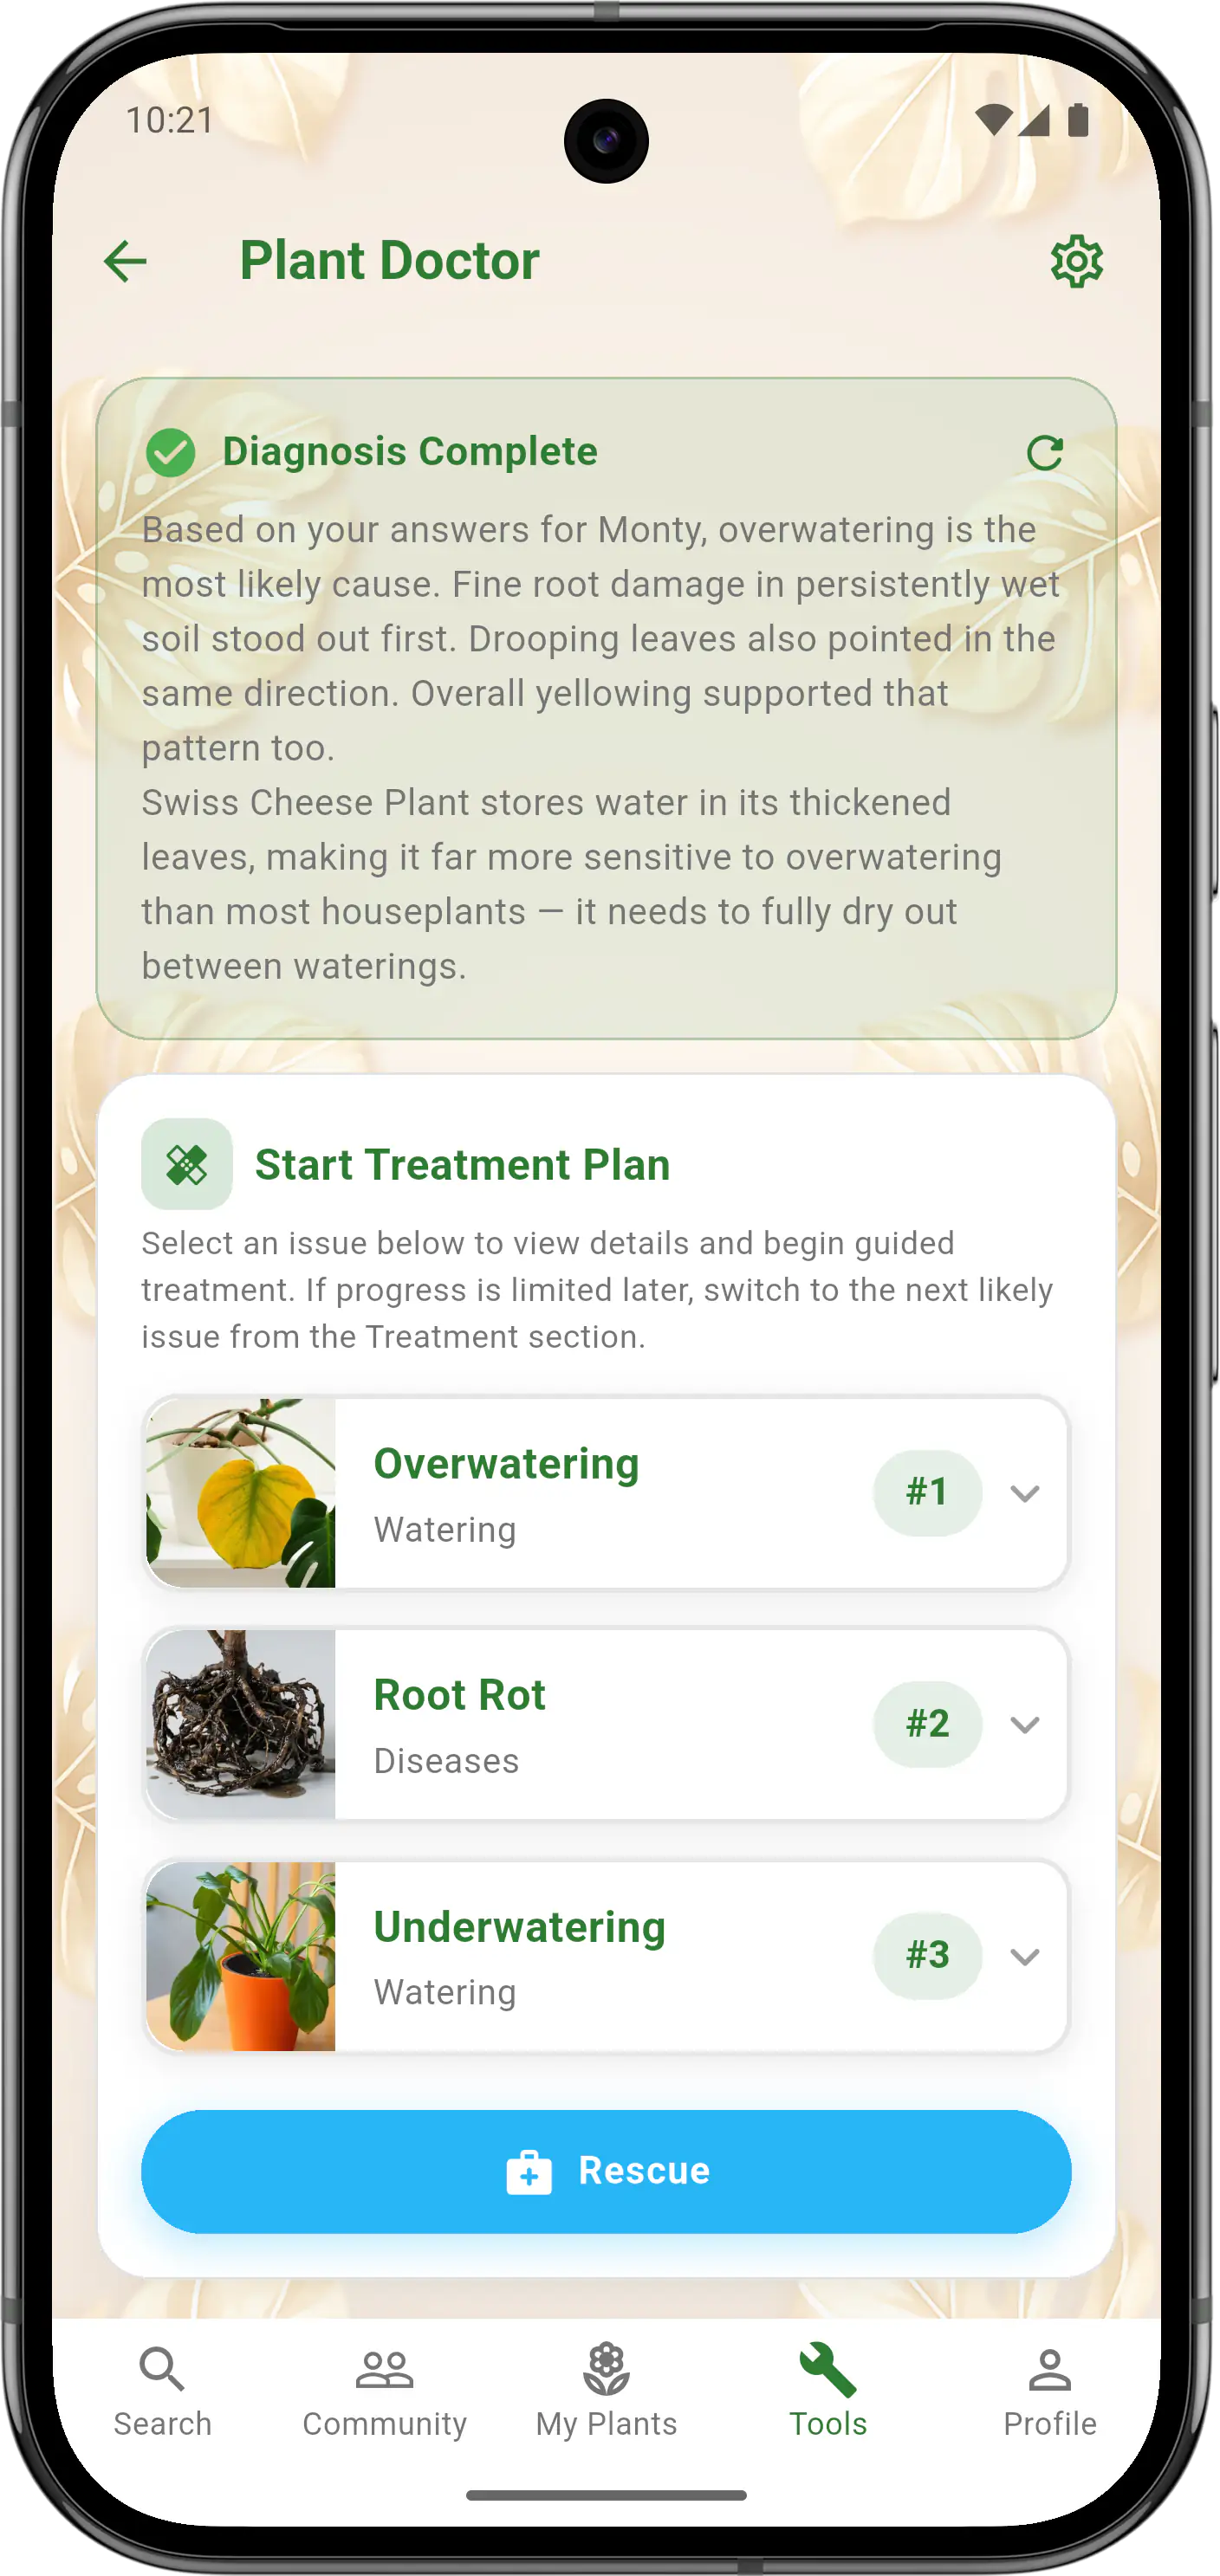
Plant Doctor
Unsure whether holes are pest-related or just old damage?
Plant Doctor helps compare feeding patterns versus mechanical tearing so your next move is simpler and more targeted.
Pattern clarity
Helps you spot patterns you might miss when symptoms overlap.
Cause separation
Uses recent care history and symptom changes to narrow likely causes.
Guided next steps
Supports observation over time so fixes stay consistent and practical.


Frequently Asked Questions
Common causes include chewing pests, physical tears while leaves were unfolding, or older damage that happened before you bought the plant. The key is whether new leaves keep developing fresh holes.
No, not always. Mechanical tears, low-humidity leaf sticking, and handling damage can also create holes that look pest-related. Before deciding, check current light, soil moisture, and root condition so your next step is based on what is actually happening.
Mark the current damaged leaves and monitor new growth for 7 to 14 days. If new leaves are clean, the issue is likely old damage rather than active feeding.
It depends on your plant and setup. Only if they are heavily damaged or affecting appearance. Leaving mildly damaged leaves can still support recovery while you confirm the cause.
Fix Plant Problems With More Confidence
Use Plant Doctor to understand what is happening and choose practical next steps for your plant.
- Check symptoms clearly
- Follow practical treatment steps
- Avoid repeat problems