Why are there brown bumps on my plant is usually a scale insect problem. They sit on stems and undersides, feed on sap, and can keep returning when treatment is too light. A careful repeat cycle usually gets them under control.
Why Are There Brown Bumps on My Plant? Scale Insect Signs and Fixes

Quick Diagnosis
Why are there brown bumps on my plant: quick diagnosis
Short answer
Persistent attached bumps plus sticky residue is a classic scale pattern. First step: Scrape-test one bump and inspect stems and undersides for repeating cluster patterns.
Most likely causes
- Protected stem settlement: bumps gather in joints and undersides
- Crawler survival: new bumps keep appearing after one treatment
- Delayed detection: symptoms are noticed after sticky residue and yellowing spread
- Plant crowding: multiple nearby plants become affected
What to do first
- Isolate first: Separate the plant before treatment to reduce spread during handling
- Manual removal: Wipe or gently scrape visible scale from stems, nodes, and undersides
- Contact spray coverage: Apply insecticidal soap or horticultural oil to all likely hiding areas, not only obvious bumps
- Repeat every 7 days: Run at least 3 rounds to catch crawler emergence and prevent rebound
What not to do yet
- Do not spray before checking hidden leaf undersides, stems, and soil-line areas
- Do not stop after one cleanup if eggs or hidden stages may still be present
- Do not treat nearby plants blindly, but inspect them before pests spread
Quick answer
Quick answer: Scale insects. If brown bumps stay attached and keep returning, treat for scale with manual removal plus repeat contact sprays.
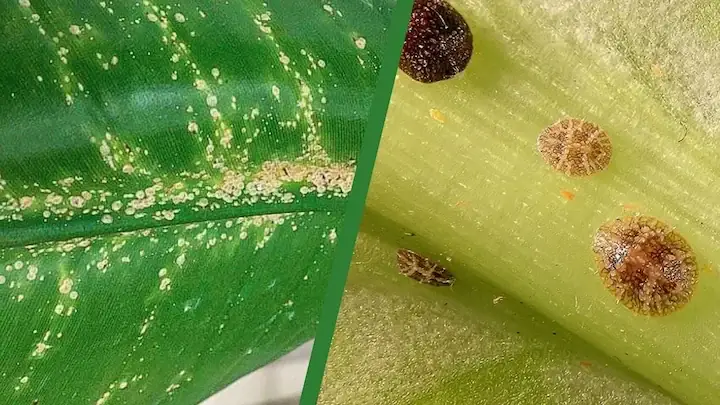
- Early sign: Scale often looks like tiny shell-like domes that do not move much
- Mid sign: Honeydew from feeding can make leaves tacky and dull
- Later sign: Plants often decline gradually as colonies build over time
What it looks like, where it hides, and what damage it causes
What it looks like
Look for repeated visible pest markers plus fresh activity over time.
Where it hides
Inspect protected growth points, undersides, and node creases.
What damage it causes
Damage usually expands in clusters when active stages are not interrupted.
Symptoms to check first
Start with what you can clearly see right now before changing treatment or care variables.
Attached bumps on stems
Scale often looks like tiny shell-like domes that do not move much.
Sticky leaves
Honeydew from feeding can make leaves tacky and dull.
Slow yellowing
Plants often decline gradually as colonies build over time.
Reappearance after wipe-down
Fresh bumps after one cleanup is a common rebound pattern.
Where to check on the plant
Inspect these locations before locking your diagnosis.
Main stems and nodes
Scale often establishes in protected stem zones first.
Leaf undersides and veins
Early colonies hide there and are missed in quick top checks.
Petiole bases and creases
Crawler stages shelter in narrow joints.
Nearby plants
Infestations often spread quietly in grouped collections.
What this gets confused with
Use this quick contrast to reduce misdiagnosis before treatment.
Mineral residue
Residue wipes off and does not regrow as attached bumps.
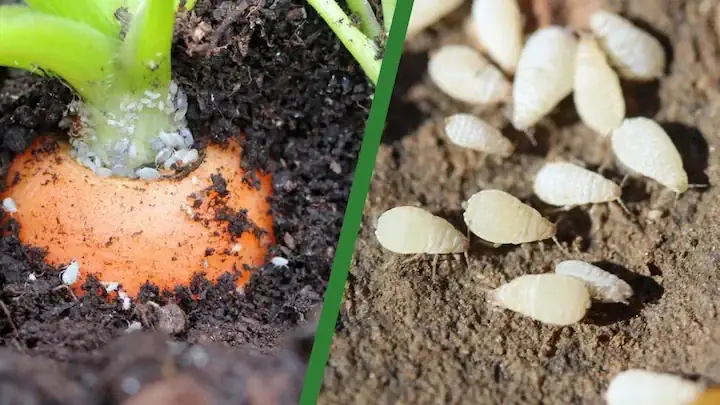
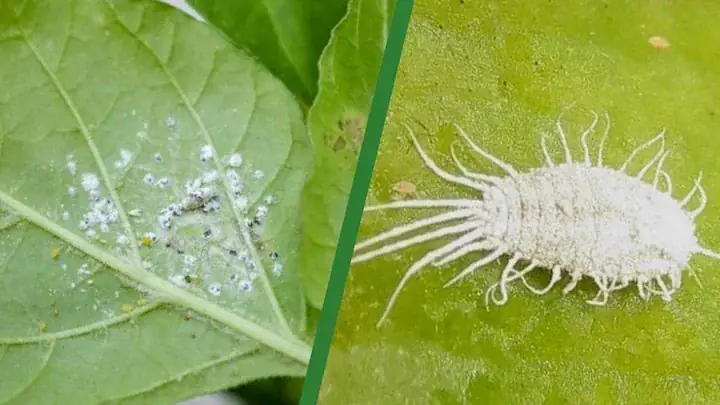
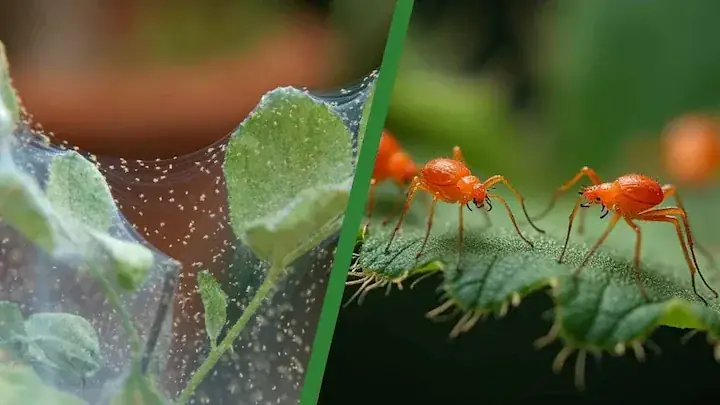
Mealybugs
Mealybugs are cottony and fluffy; scale is more shell-like and firm.
Natural stem texture
Natural texture is uniform and stable, not clustered and spreading.
Why this happens
Choose the closest driver first, then run one correction at a time.
Protected stem settlement
What it looks like: Bumps gather in joints and undersides.
Why it happens: Sheltered areas protect scale stages from quick cleaning.
First correction: Isolate, clean visible activity, and begin repeat treatment cadence.
Crawler survival
What it looks like: New bumps keep appearing after one treatment.
Why it happens: Early mobile stages survive when follow-up rounds are skipped.
First correction: Isolate, clean visible activity, and begin repeat treatment cadence.
Delayed detection
What it looks like: Symptoms are noticed after sticky residue and yellowing spread.
Why it happens: Scale blends into stems and is easy to miss early.
First correction: Isolate, clean visible activity, and begin repeat treatment cadence.
Plant crowding
What it looks like: Multiple nearby plants become affected.
Why it happens: Close spacing increases spread risk and reduces inspection quality.
First correction: Isolate, clean visible activity, and begin repeat treatment cadence.
How to confirm it
Before you treat, run these checks to confirm you are targeting the right problem.
-
Gentle scrape test
A scale shell lifts off as an attached insect body, not just dust.
-
Sticky residue check
Tacky surfaces support active sap feeding.
-
Cluster mapping
Similar bumps repeat in nodes and underside hotspots.
-
3 to 5 day recheck
New tiny bumps mean crawler stages are still active.
Treatment cadence and repeat intervals
- Interval: Every 5 to 7 days
- Rounds: 3 cycles minimum
- Recheck window: Recheck every 48 to 72 hours
- Stop rule: Stop only after no new signs across repeat checks.
Signs it is improving vs signs it is getting worse
Improving signs
- Fewer fresh signs appear between checks.
- Damage progression slows on new growth.
Worsening signs
- Fresh hotspots appear on new tissue.
- Nearby plants start showing the same pattern.
How to fix it
Follow the sequence without skipping repeat cycles.
Isolate first
Separate the plant before treatment to reduce spread during handling.
Manual removal
Wipe or gently scrape visible scale from stems, nodes, and undersides.
Contact spray coverage
Apply insecticidal soap or horticultural oil to all likely hiding areas, not only obvious bumps.
Repeat every 7 days
Run at least 3 rounds to catch crawler emergence and prevent rebound.
Neighbor check
Inspect nearby plants immediately and treat early hotspots.
Track recovery
Watch for fewer new bumps and cleaner new growth over 2 to 4 weeks.
⚠ Escalate quickly if you notice:
- Fresh bumps appear after each treatment pause.
- Sticky residue spreads to multiple leaves or plants.
- Yellowing continues despite cleanup.
- New growth remains weak and infested.
How to prevent it
Use these habits to reduce reinfestation risk and catch activity early.
-
Weekly stem-joint checks
Scale usually starts in protected stem pockets.
-
New-plant quarantine
This prevents hidden introductions from spreading.
-
Routine wipe-downs
Regular cleaning helps spot early colonies sooner.
-
Early treatment
Small scale colonies are much easier to clear.
Plant Doctor
Not sure if bumps are scale or residue?
Plant Doctor helps compare bump texture, spread pattern, and sticky clues so treatment starts with better confidence.
Pattern clarity
Helps you spot patterns you might miss when symptoms overlap.
Cause separation
Uses recent care history and symptom changes to narrow likely causes.
Guided next steps
Supports observation over time so fixes stay consistent and practical.
Frequently Asked Questions
Start with one direct check before changing care routines. For scale bugs, prioritize the most direct confirmation step first. Check light level, soil moisture depth, and root condition before making changes. Track results for 7 to 14 days so you can confirm what improved.
Start with one direct check before changing care routines. For bumps scale, prioritize the most direct confirmation step first. Check light level, soil moisture depth, and root condition before making changes. Track results for 7 to 14 days so you can confirm what improved.
Use a quick diagnosis pass first so your next step matches the actual issue. With treat scale, document one clear signal before changing routines. A simple light check and moisture-depth check usually rules out the biggest mistakes quickly. Make one small adjustment at a time to avoid overcorrecting.
Start with one direct check before changing care routines. For scale bugs, avoid broad resets and test one correction at a time. Check light level, soil moisture depth, and root condition before making changes. Document what changed this week so future decisions stay clear.
Control Plant Pests With More Confidence
Use Plant Doctor to identify likely pests and follow practical treatment steps that are easier to stick with.
- Identify likely pests faster
- Follow repeatable treatment steps
- Reduce reinfestation risk